Showing posts with label crafts. Show all posts

Saturday, October 12, 2013

Thanksgiving Table Cloth Project


This was such a fun project I did last year before Thanksgiving. I had seen this idea somewhere on one of my homeschooling websites, I'm sorry but I don't remember where. But I basically went to the Goodwill and bought an old sheet in a neutral color and some fabric paint in assorted fall colors. I poured the paint onto paper plates to make it easier to apply the paint to everyone's hands and I went around the table having each child press their hand prints in the spot where they would normally sit for a meal. The ones who were old enough signed their own names, (including my silly husband.) I then took a permanent marker and wrote out the Bible verse in the center of the table cloth. "O, give thanks to the Lord, for He is good. His love endures forever." 1 Chronicles 16:34

Such a fun project and a wonderful keepsake table cloth! Looks like we'll adding some new hand prints this year too!

Hospital Nursing Gown with Matching Little Girls' Dresses and Review


I have just under three weeks left until I deliver my precious little girl via c-section. She will be our third daughter, fourth tubal-reversal baby, and my seventh child!


(Here I am with my six amazing kids who treated me to ice cream on Mother's Day this year. I am about 3 months along here.)

I can hardly believe the baby will be here and that this is all even real some days! I wanted to share my latest project I finished, my very own hospital nursing gown, I made myself!

I was looking on Pinterest and found this great post about making your own hospital nursing gown from The Crafty Cupboard.

I was really excited to attempt to make this hospital nursing gown as I wanted something to look forward  to as I never look forward to having c-sections. After all  this will be my seventh c-section and also my ninth major abdominal surgery.

Disclaimer: I haven't actually sewed anything in YEARS, (except for minor clothing repairs). I haven't tackled a major sewing project like this since before I had kids about 17 years ago.


I pre-washed and dried all my fabric before beginning. I then printed out the hospital gown pattern pieces on my printer.

 I followed the suggestions of a 36 inch length as I am not very tall and that turned out to be a nice length for me. I tapered my cutting to a nice A-line shape as suggested to accommodate my large tummy.


I followed the rest of the blog instructions fairly easily, creating a lovely nursing gown that doesn't fall off my shoulders thanks to snaps in the front and at each side. You can see a better a view of the front here.


I had a little trouble learning how to use the lightweight interfacing around the neckline, but it was definitely worth the effort as it makes for such a nice crisp neckline to attach snaps to. I accidentally ended up sewing my neckline completely together instead of just ironing it out as directed. The directions said to top stitch and I thought it meant to stitch it closed. This made it more difficult to sew the neckline onto the dress so I added an extra step and  sewed purple binding ribbon to the inside of my dress in order to attach the dress to the neckline. It ended up coming out just as nice. I added purple binding ribbon to the sleeves that match the ribbon around my tummy. I think it came out rather nice! Overall, I think the tutorial from The Crafty Cupboard was very thorough and I would definitely attempt to make this dress again.

The total dress cost probably less than $30 including 3 yards of material, purple thread, purple binding ribbon, and velcro, and snaps.

Now for the matching little girls' dresses!


My mother bought me a Simplicity New Look pattern at Wal-mart to make the girls' dresses in size 4 and 6, (along with all the material, it was a very nice birthday present for sure)! Thanks again, MOM!

I just followed the instructions and they were fairly easy to put together. The gathering at the waist was a little tricky but by the time I got to the second dress I got the hang of it. Since I took this picture above I have sewed some little purple bows onto the necklines and added purple ribbons at the waistline to match my gown.

For the infant gown I was inspired by another Pinterest post by Sweet Haute. Lazy Girl Designs has another hospital nursing gown but it didn't have the detachable nursing neckline like I wanted so I ended up going with The Crafty Cupboard's design. But what I DID like about this post was the cute matching infant gown. I basically made a small dress and sewed an elastic into the bottom of it and then sewed it to an infant onesie. I already had a pretty sweater and hat saved from my daughter so I thought it matched perfectly the purple fabric I chose for my dress!

I have two more dresses to make for the girls but I am already looking around at what I can sew next! Well, maybe after the baby comes I hopefully can pick up my sewing again soon. It is such a wonderful way to spend an afternoon! What sewing projects are you working on? 


Sunday, October 21, 2012

3-Ring Binder Fairy Dollhouse

Homeschoolers LOVE binders! They are the heart of homeschooling and keeping track of our kids' work. But this is one of my favorite uses for a 3-ring binder yet!

My almost 5 year-old daughter was recently invited to a birthday party for her friend. My daughter bought a little fairy doll from the dollar store (with her own money) and I made a fairy binder dollhouse for the fairy doll!

I first got the idea for this binder dollhouse from Southern Disposition. Click on over there for the whole tutorial on how to make this. I will show you what I came up with though.

I started with a plain white 1 inch binder from Wal-mart.


Next I glued some green colored scrap booking paper right into the binder using my hot glue gun.
This is to cover the 3-ring binder and hide the rings from view.
(My last binder dollhouse I used fabric to cover the rings. I thought I would try paper this time and I thought it worked just fine.)
Here is a photo of one side glued down.


Here is what the front of the 3-ring binder dollhouse looks like personalized!
I let my daughter help place the letters for her friend's name as well as add some stickers.
I finished the binder cover by adding marker outlining and labeling.
Then I just placed the 8 1/2" by 11" paper inside the front binder pocket!


For the back I used some scraps of scrap booking paper and a photo of a fairy tree house just for fun!


And now the view of the inside....


"Fairy F'ee" now has a lovely home!
On the left is her bedroom made from a "bird's nest". I used scrap booking paper that looked like hay layered underneath sheets of colored tissue paper I cut into leaf shapes and glued on. A scrap booking "stamp" makes a nice wall hanging and another scrap booking paper makes a nice "clock".
A friendly bird (another sticker) watches over the nest. An acorn makes a nice pillow for Fairy F'ee and a leaf is a great blanket!

On the right is Fairy F'ee's dining room as she looks out onto the open meadow through her fairy tree home! I made a table out of a postcard and chairs out of keys and button scrap booking stickers. Some other fun stickers for silverware and other natural elements to decorate the rest of the room and the fairy dollhouse binder is complete!

If you missed my other post on 3-ring binder dollhouses, you can read here my first attempt!

Let me know if you try this, I'd love to see how others use their binders to make dollhouses!

Saturday, July 14, 2012

3-ring Binder Dollhouse Complete! "Camp Dobsee"


Southern Disposition had this wonderful tutorial on how to make a little girl's portable dollhouse out of a 3-ring binder. This looked like the perfect summer project for my daughter and I as we head for our annual family vacation to a family camp! My daughters love to play with their little dolls, this is a fun, creative, and portable way to enhance their fun! (Inexpensive too! We just used stuff I already had on hand!)

We started with a plain white 1 1/2 inch binder.


We cut out the binder cover from some leftover lace. When I say left over, I mean, left over. This lace is from when I used to make bunnies back in eh hem... 1995. I found it in a box and it is in perfect condition!


Here is the 3-ring binder covered with lace. I used hot glue instead of taking the time to sew seams. It worked pretty well.


We then just decorated the inside with left over scrapbooking papers and stickers.
My daughter got a little carried away with the stickers, but I figured it was her book anyway I would let her do what she wanted with it! The left side is the lakeside at my mother-in-law's camp. Here we go fishing, swimming, canoeing, roast marshmallows, snorkeling, and have picnics as seen by all the stickers! The right side is the inside of my mother-in-law's camp. I even had a piece of scrapbooking paper that looks like the particle board walls of camp! It's supposed to look like the kitchen with mirror on the wall, cabinets, sink, and even storage hidden under fabric curtains, just like at camp!


Here is my  4 year-old daughter setting up her dolls to play with her new dollhouse "Camp Dobsee".


And here is her younger 2 year-old sister getting in on the fun too!


They have to share for now, but I can see more binder dollhouses in our future!


Thursday, July 12, 2012

3-Ring Binder dollhouse


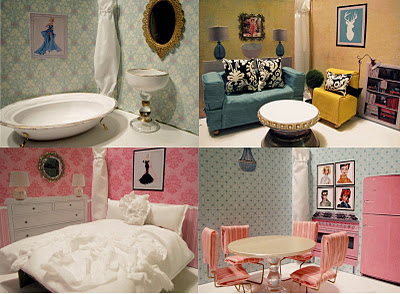
Southern Disposition has this wonderful tutorial on how to make a 3-ring binder dollhouse for your little girl!


I want to make one for my girls to take to camp next week. We often end up recycling card board boxes while we are at camp, this looks like so much fun!